June 1st
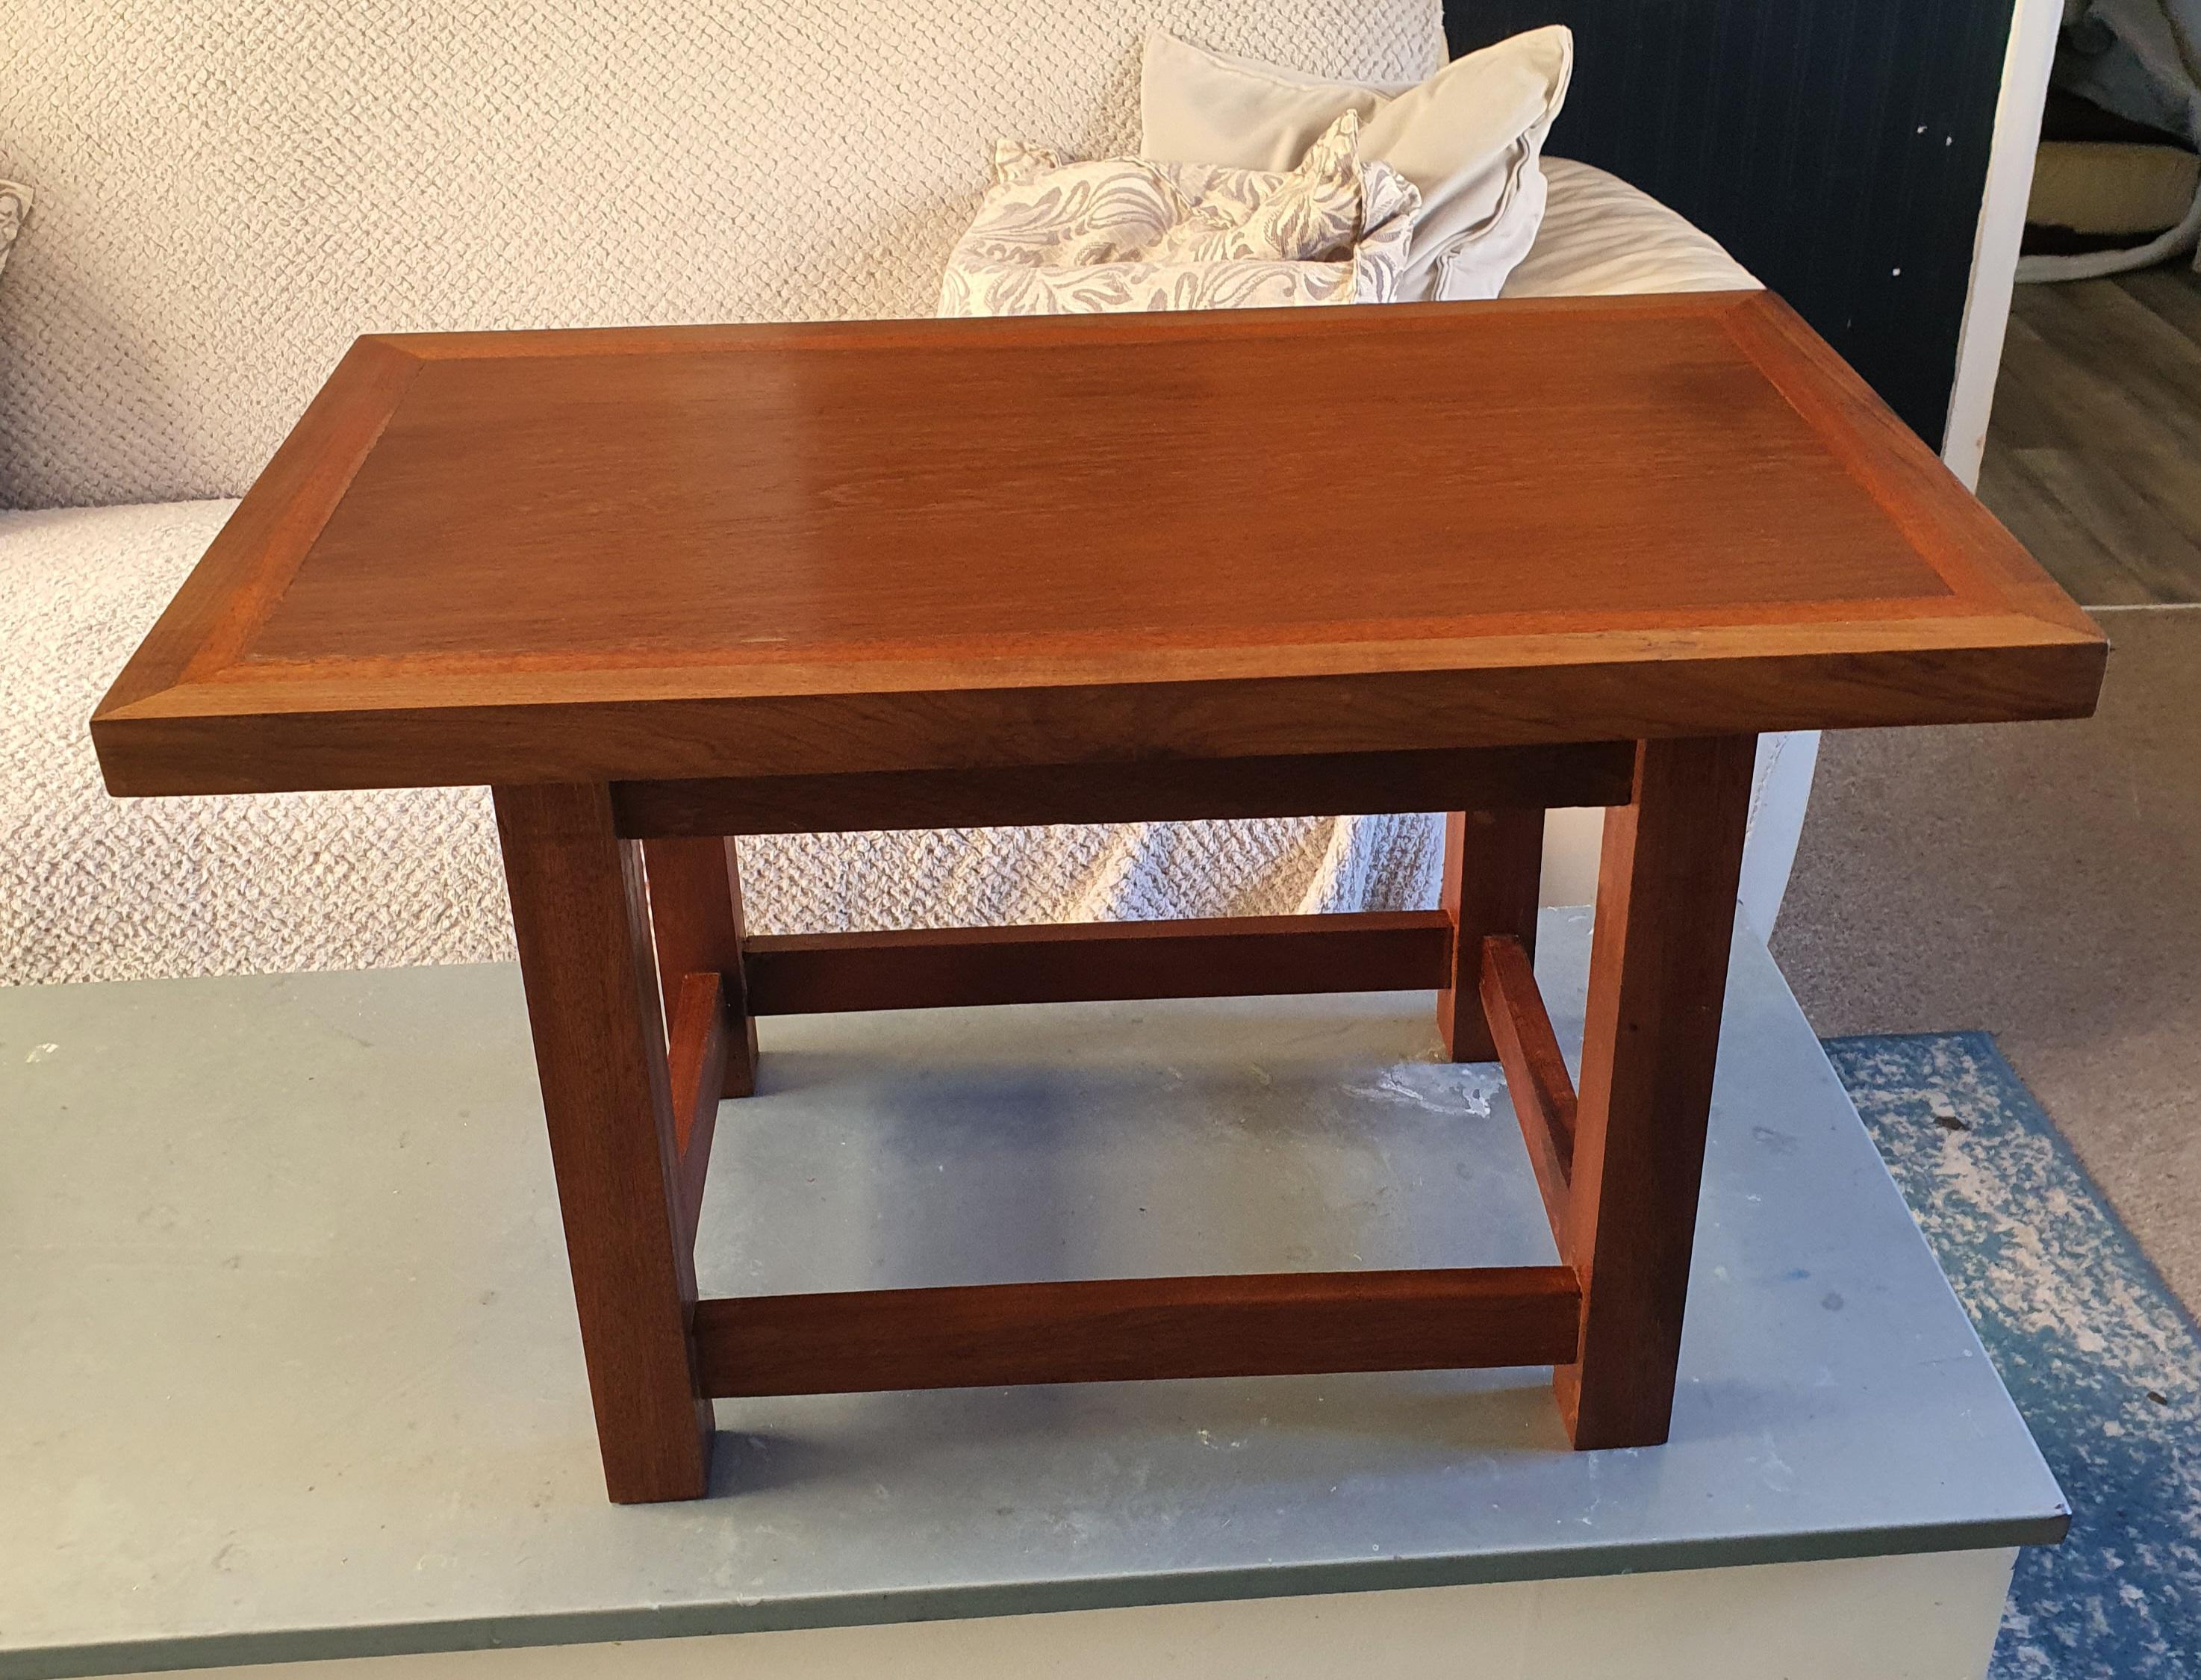
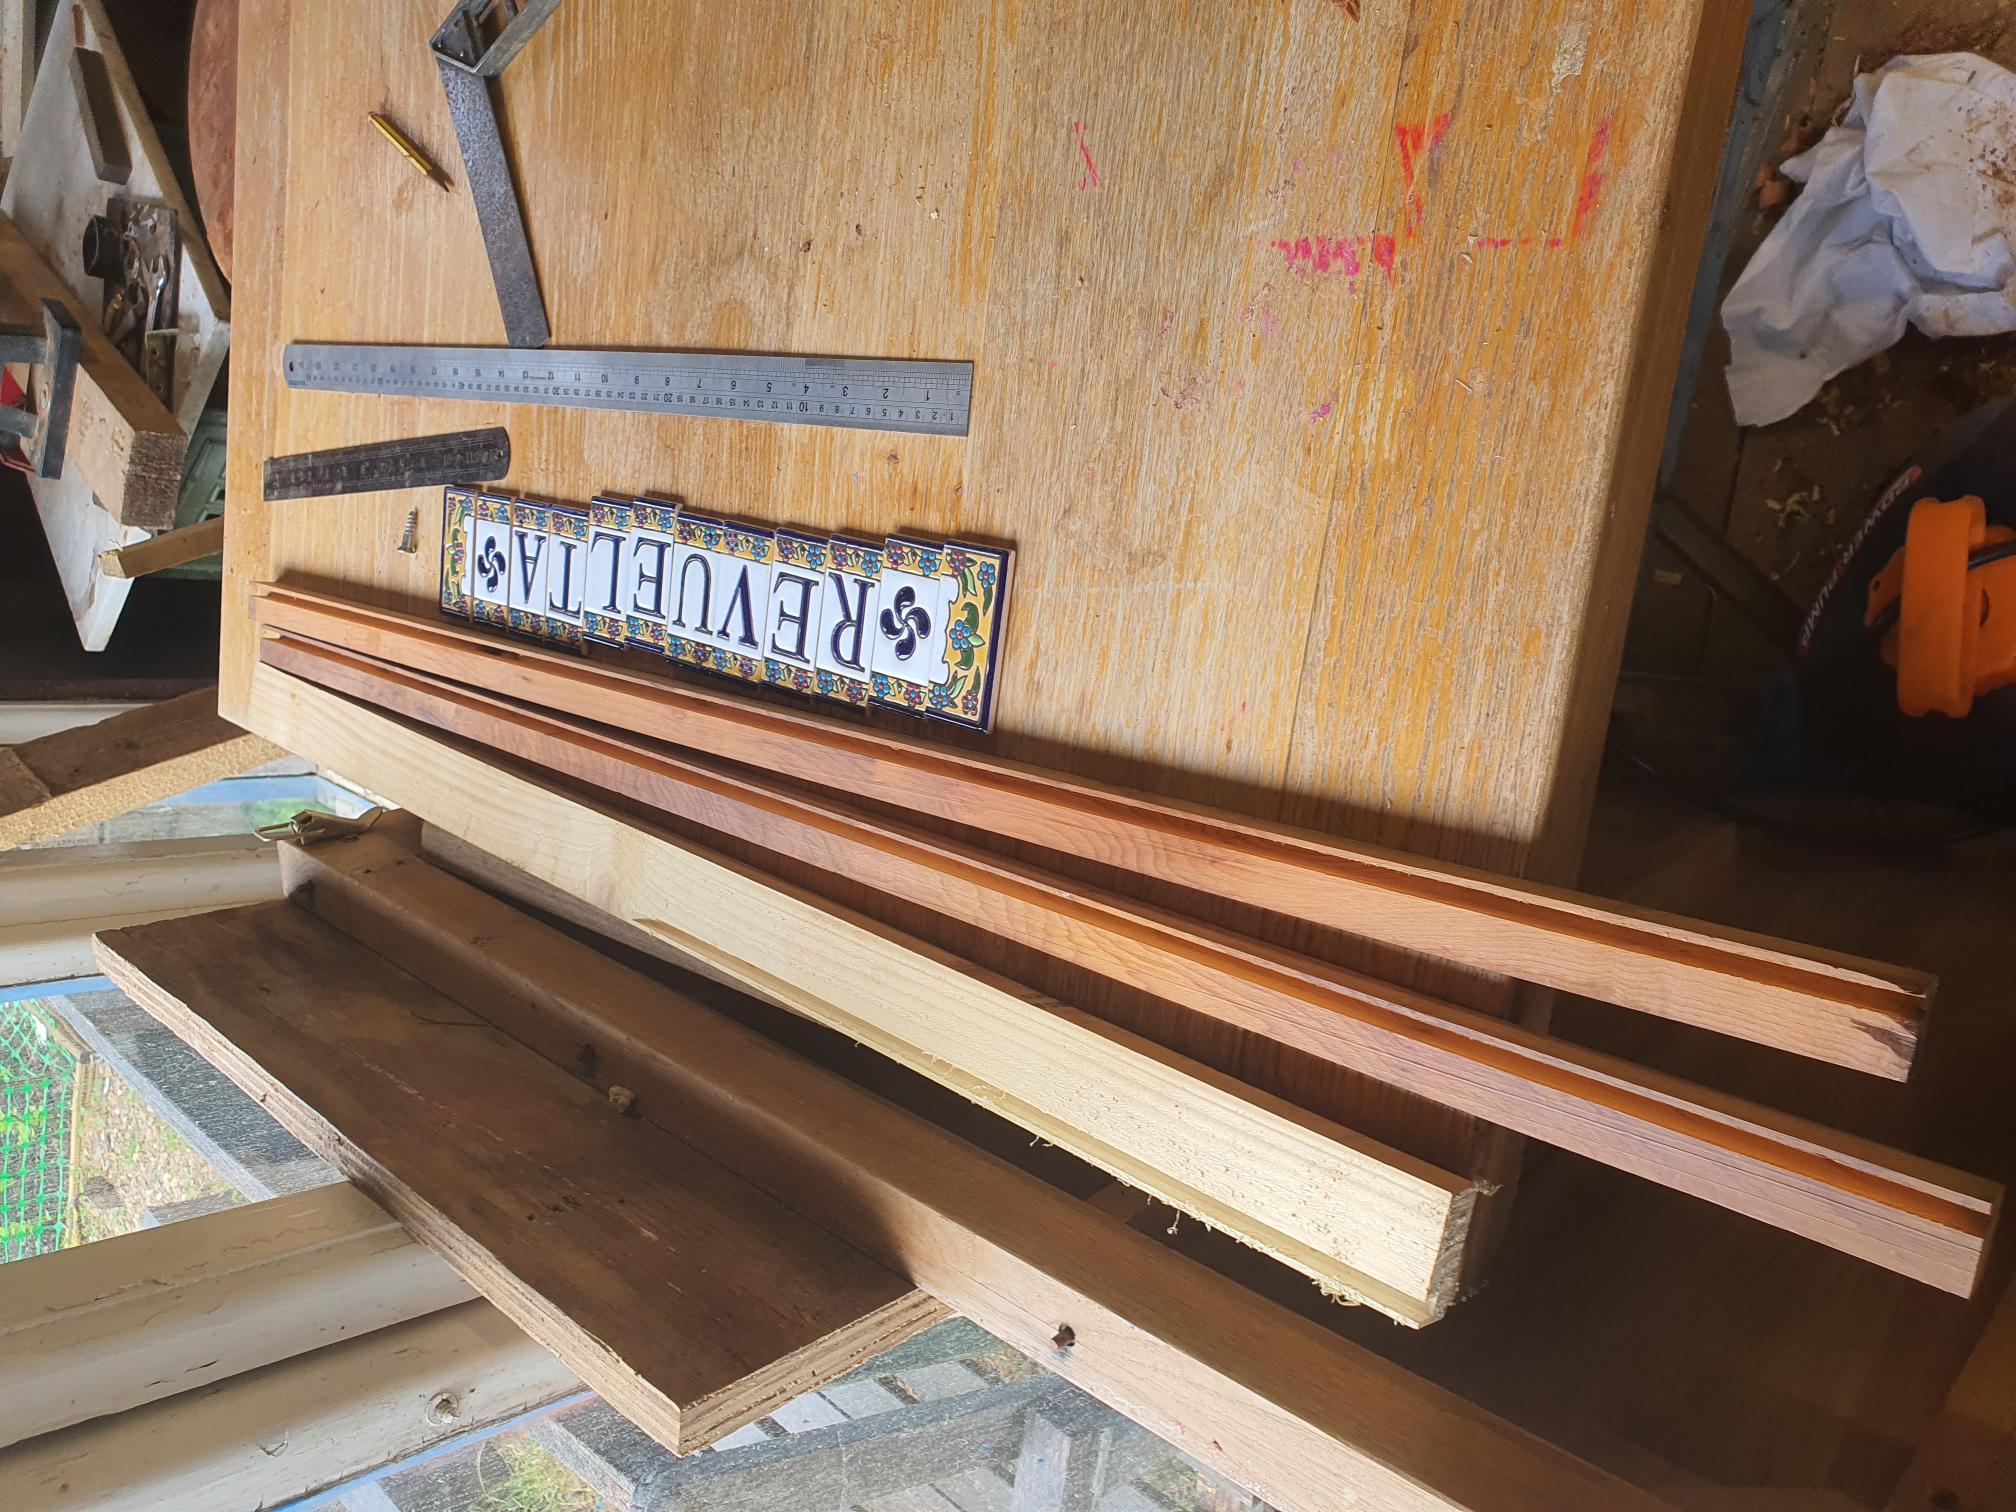
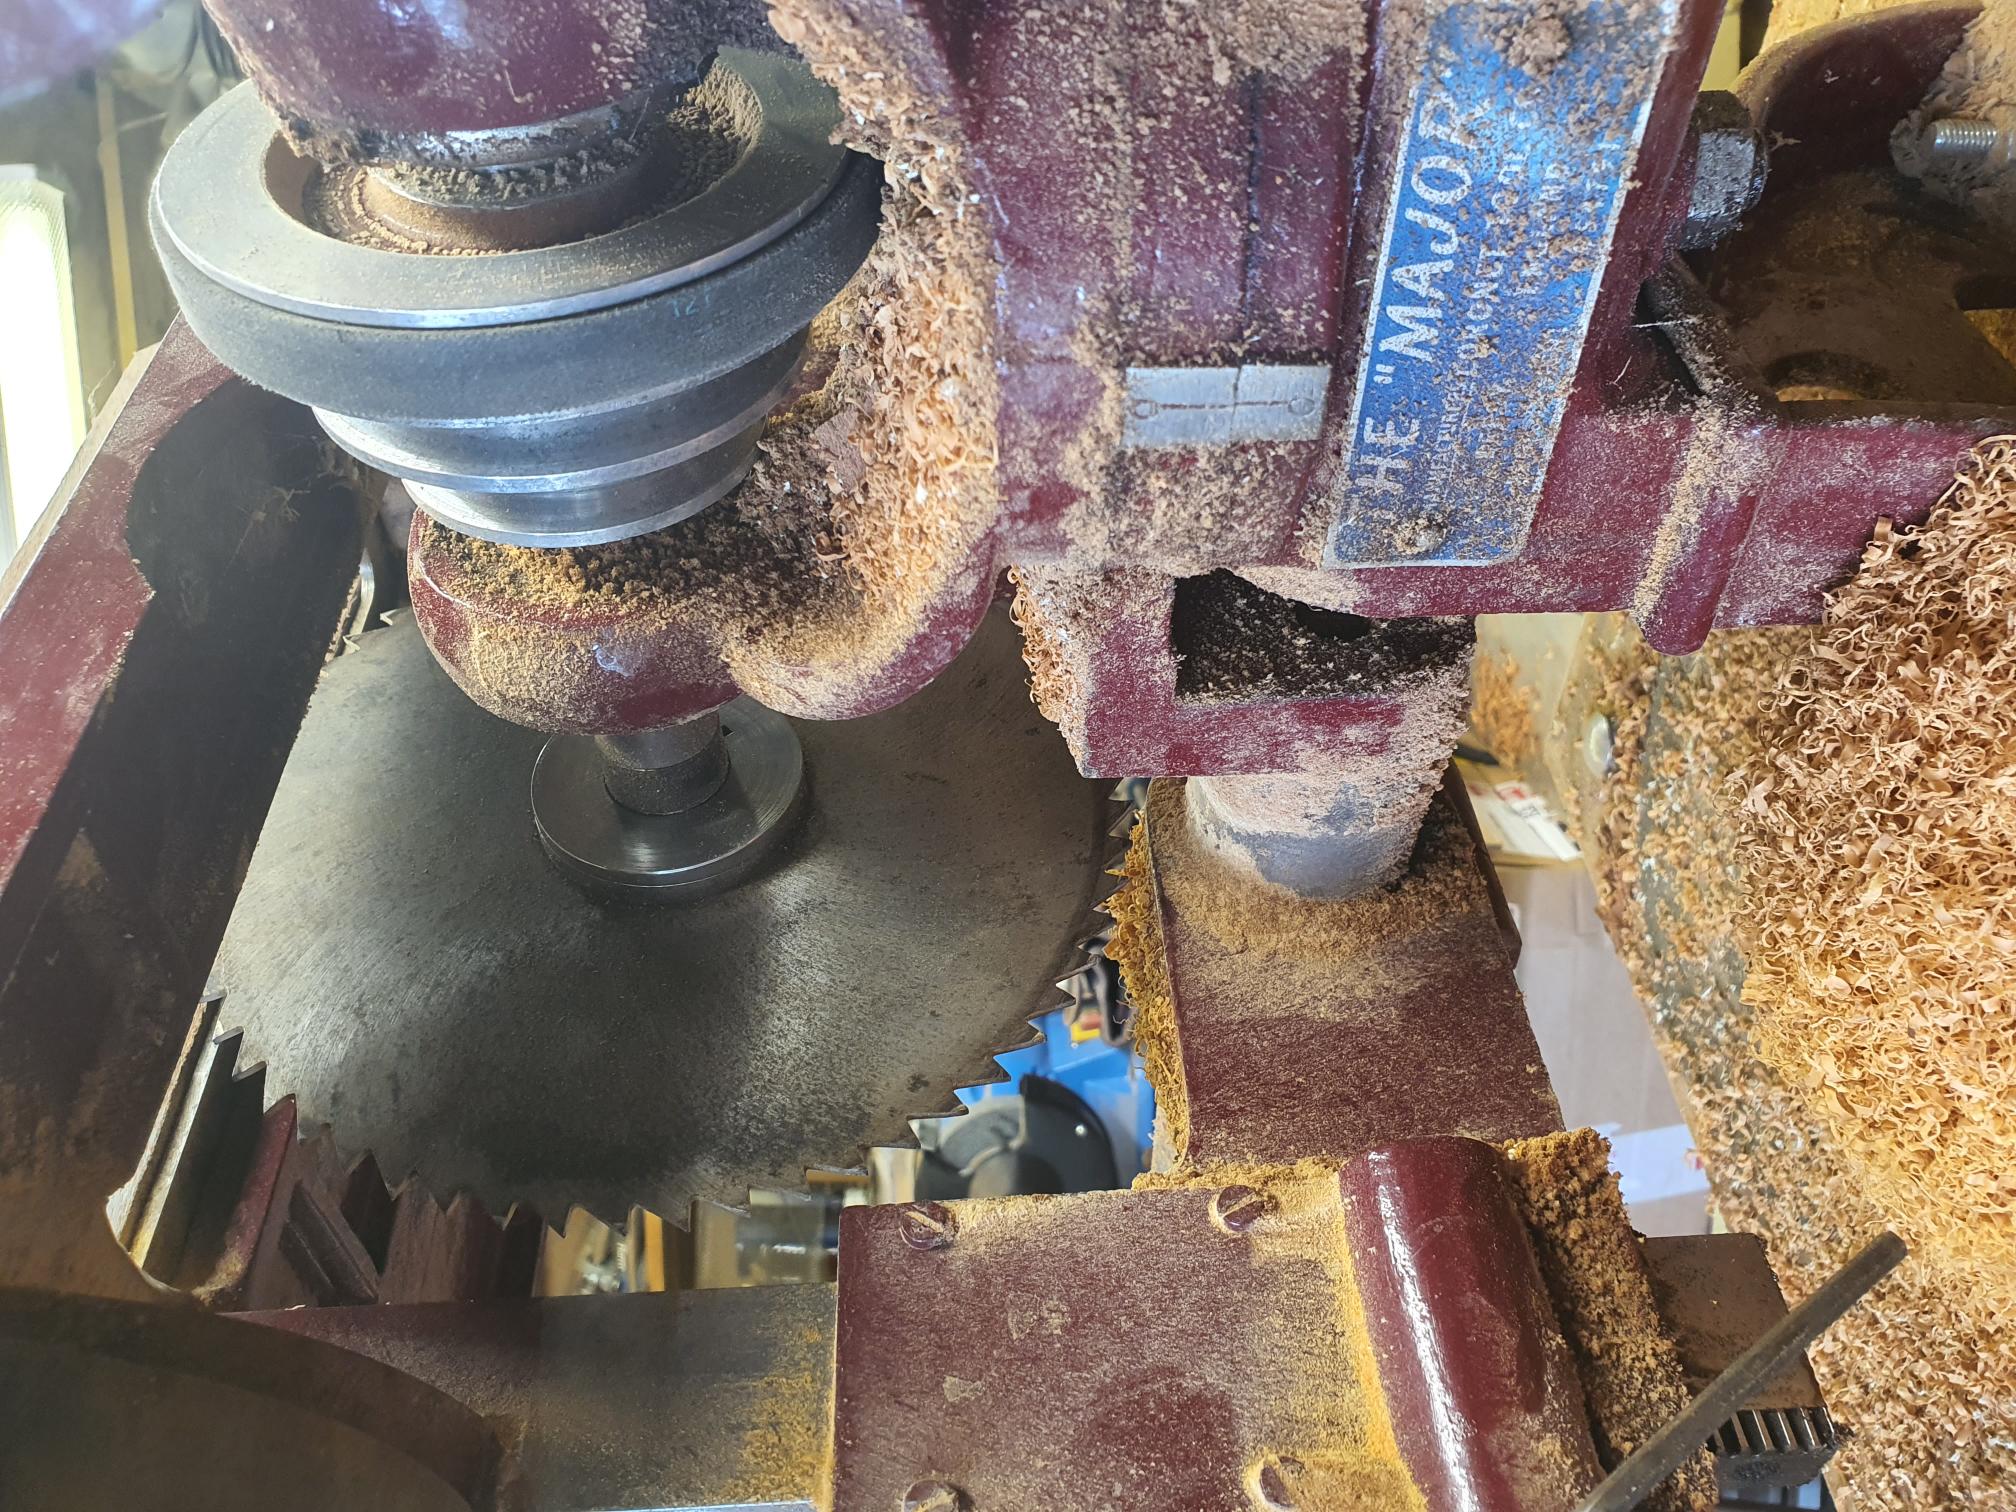
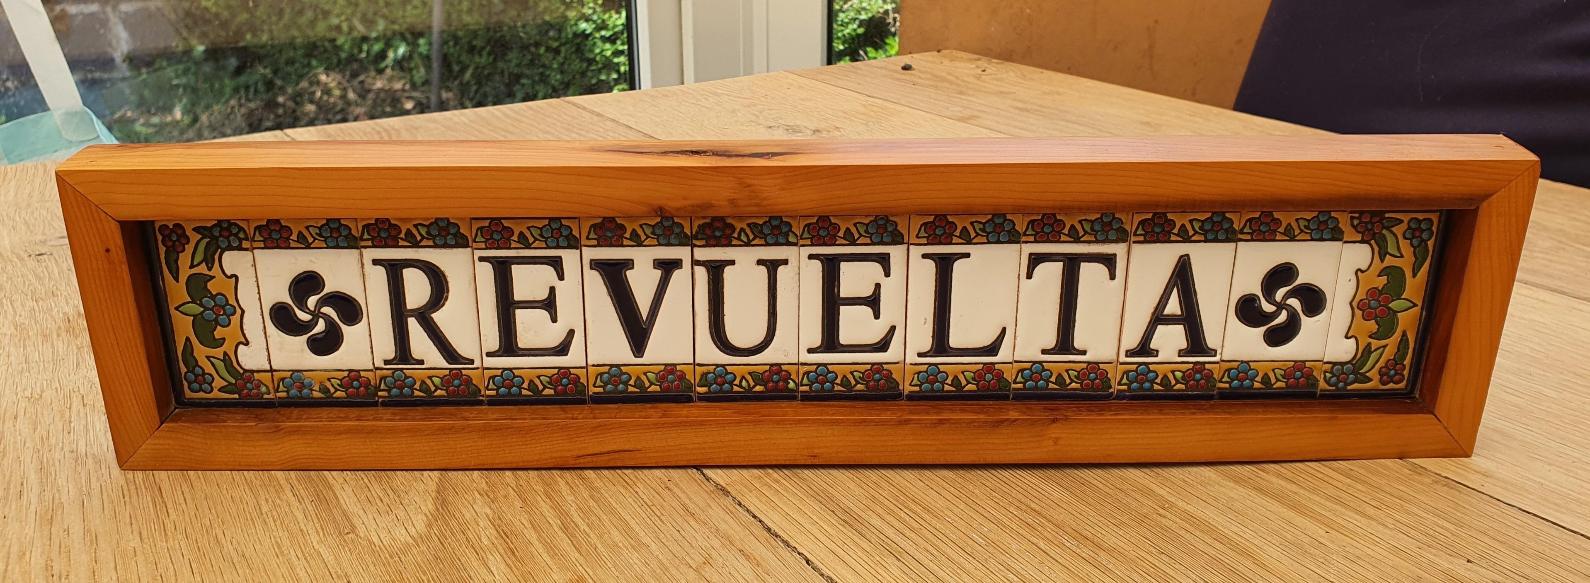
Another small job for the old Major and this time it's for my daughter. It's a frame for some ceramic alphabetical tiles she brought back from the Basque region of Spain that spell out the family name on her mother's side. There is a strong family connection to this area as my wife's father was a refugee from Franco's dictatorship and came to England on the SS Habana in 1937. He spent the last years of his life in Dorset amongst his large family so I chose some yew wood that had come from a local tree to make the frame. I rebated the edging strips with the wobble saw fitted to the Major and am waiting to mitre cut the strips to just above size before truing them on the sanding plate. Below you can see the rebated strips and the wobble saw attached to the Major. Note the wobble saw table insert in place. I cut the mitres on the Major and trued them up on the sanding plate before gluing and clamping together with the 5mm back board set in the rebated frame. To bring the frame up nice I used 400, 600 and 1000 (I'm showing off now) grade sandpaper before treating it with three or four coats of Osmo oil rubbed in with a lint free cloth. I used a two part resin glue to attach the tiles to the back board not trusting something so precious to some run of the mill tile adhesive.
I had an email on the weekend from someone who turned out to have bought a Classic 10 bandsaw that I had seen on ebay some time previously. I recognised it from the likely washing machine motor that was powering it at the time. Gareth gave it a much needed refurb which included a paint job, replacement motor and new tyres on the wheels, pics have been added to the Classic 10 page. Pics of his Major are hopefully on the way soon.
A Coronet Minorette and a good range of attachments has been posted on the FOR SALE page so click on the link and have a look. You can contact the owner directly through the email address posted on the page.
August 29th
Re Derek Pyatt and www.coronetwoodworking.co.uk
I've had a couple of messages through from people who had tried to contact Derek through his website and found out that the website was no longer available. I checked it out myself and found it indeed to be offline and immediately rang Derek to find out what was going on. It turned out that Derek had had the same problem as me regarding renewing his domain name late and finding out it been hoovered up by a bot trawling the internet for non-renewed domains. The outcome was as per my experience that the domain name was now owned by some micro-penised individual who was now demanding a large sum from the original owner for it's return. This individual deserves to be tied down on a Coronet Major cabinet and then have a Majorette dropped on him from a great height. No respect for classic woodworking machinery some people and clearly none for the Coronet enthusiasts who take the time to set up and maintain a website dedicated to helping out, supplying parts for and manuals for machines and generally educating people about the Coronet brand which is in itself a noble task.
Derek will no longer be selling manuals for machines but has transferred me his remaining stock to supply to people requiring one. For your manual or information sheet requirements please email me (Pete) on dorsethammer@hotmail.co.uk However Derek will still be available by telephone or email for advice. His phone number is 07711608583 and email is derekpyatt23@gmail.com so do contact him no matter how obscure the query, there's a good chance Derek will know the answer.
Derek will also be transferring his extensive collection of Coronet literature to me in the near future to join up with mine. The plan will then be to set up an online tribute to Derek hopefully hosted on the Boleyn Workshop website.
RC (remember him?) is back in town and threatening to attend the Boleyn one evening for old times sake. I feel a pot of tea, a box of broken biscuits and a game of air pistol darts coming on.. Must locate those ear defenders as a matter of urgency.
November 18th
Derek's impressive collection of Coronet literature has duly arrived at the Boleyn Workshop and what a collection it is. Workshop manuals from the Coronet range of machines, advertising posters, catalogues collected from events from where the company had displays, spare part order forms, price lists etc. It's a fascinating dive into the paper side of the Coronet Tool Company that was behind the machines promoting their designs out into the world. I have an A4 box file of my own literature but Derek's arrived in a medium sized cardboard box to give some idea of the size. The first job has been combining it all with my own vastly inferior collection and to divide it into several sections such as manuals, posters, price lists and correspondence. I am sure some items will have more than one copy so I will choose the best of them for scanning and posting. Hopefully this site will have enough space for the bulk of it if not all of it. Fortunately a family member has access to a large enough scanner for the posters and there rest of it will be done on my printer if I can get the blooming thing to work and save it. And then post it here obviously. If only Coronet had made printers..they might have been maroon in colour and weighed in at 3/4s of a ton but at least I could have made it work. Probably.
Overall correspondence through the site this year has been rare as the mythical compound cross slide attachment. A few enquiries for spare parts have been forwarded to Ed the Wood in Blackpool as he has a large stock of spares for all Coronet machines. But in September I was contacted by Rob who had the sad task of sorting out his Dads workshop as he was unable to continue working in there. He needed to find a good home for his Dads Coronet Minorette and kindly offered to donate it to the Boleyn Workshop. It is now set up and running in the workshop and photos have been added to Yet More Readers Machines including the ubiquitous box of bits. I do love a good box of bits me. This one was no exception as it contained a selection of saw blades including a wobble saw and some expertly constructed home made jigs such as a hold down spring and a possible comb/finger/box jointer. I can't decide which.
December 5th
Just as I was saying that no one writes in anymore I received an email from Owen who is not the just the proud owner of a Majorette and a Capitol 7" planer (pics up in Yet More Readers Machines )but a hopeful future Classic 10 owner. If you have one for sale, could be persuaded, might just think about it or know a bloke from the pub whose mate's cousin has got one then please email me at dorsethammer@hotmail.co.uk and I will pass your details on. Which reminds me I'm still waiting for the return of my Classic 10 casing that has been out for repair. I need it back in action.
So how have I got on with my projects and priorities this year? I can report that 2 out of 3 projects were completed and 2 out of 5 priorities were attended to. I am consistent if nothing else. This week my mother managed to have her 90th birthday party and major heart surgery within four days of each other. After visiting her in Southampton I was cruelly dragged around that major Swedish prefab furniture and other household crap emporium down on West Quay by my long suffering wife. I can now confirm that IKEA stands for I Kan't Escape Aaaagghhh.
For more maroon dribble please visit the site again soon and in the meantime Keep it Coronet.
December 17th
I had a long chat with the legend Derek Pyatt last night. Amongst other things we were both bemoaning the fact that there doesn't seem to be another generation interested in classic woodworking machinery following on. Since the boom days of the early internet when suddenly spare parts, entire machines and previously unpublished paperwork became available at the click of a keyboard, things have slowed right down. The covid lockdowns provided a brief resurgence of interest as people desperately sought refuge from their families in their workshops or garages and suddenly found the need for a nice bit of kit to work on. The internet has been bittersweet thing in the sense that so much information was suddenly available but so was a hell of a lot else that didn't mean spending time in draughty workshops or dimly lit unheated garages. But every action has a reaction so it's possible that there will be a Luddite style rebellion against technology in the future and people will return to working with their hands in their spare time and rediscover the simple pleasure of making some rusty metal shiny again. There is of course a plethora of this to be found online but watching it being done great as it is, simply isn't the same as getting your hands dirty and making parts that were designed to do a job move again as they were intended.
As a result of a hard to shift covid like virus I probably caught from that Worx table saw there has been no workshop time lately. So the only thing left to do is wish my loyal reader(s) a very Maroon Christmas and a Peaceful New Year. See you in the Boleyn 2026!
- FOR SALE or WANTED
- About the Boleyn
- Home
- Zakwood Workshop Embu KENYA
- Inside the Boleyn (2005-2012)
- Inside the Boleyn 2013
- Inside the Boleyn 2014
- Inside the Boleyn 2015
- Inside the Boleyn 2016
- Inside the Boleyn 2017
- Inside the Boleyn 2018
- Inside the Boleyn 2019
- Inside the Boleyn 2020
- Inside the Boleyn 2021
- Inside the Boleyn 2022
- Inside the Boleyn 2023
- Inside the Boleyn 2024
- Inside the Boleyn 2025
- Inside the Boleyn 2026
- Technical Stuff
- Speed reduction gearbox fitting and operating instructions
- An Interview with Derek Pyatt
- Apollo no1 stove
- Coronet Imp bandsaw-blade-setting-advice
- Coronet Imp official hints on using
- Brook Gryphon 1hp motor connection diagram
- Charles Parker
- Coronet advertising etc
- Coronet Woodworking Machines catalogue
- Coronet Capitol planer
- Coronet Sovereign planer
- Coronet Classic 10 bandsaw
- Coronet Imp bandsaw
- Coronet Consort
- Coronet Elf
- Coronet Hobby lathe
- Coronet Home Cabinetmaker
- Coronet International Woodworker
- Coronet Major
- Coronet Majorette
- Coronet Major General
- Coronet Minor
- Coronet Minor paperwork
- Coronet Minorette
- Ernest's Coronet Minor
- Readers Machines
- More Readers Machines
- Even More Readers Machines
- Yet More Readers Machines
- MILFs
- Guestbook and comments
- Heimag A5 Tischbohrmachine